If you’re looking for a fun and delicious dessert that’s as easy to make as it is impressive, this Strawberry Earthquake Cake is just what you need! With its moist cake base, sweet strawberry swirls, and a gooey cream cheese layer, every bite is bursting with flavor. Whether you’re baking for a family gathering, a potluck, or just treating yourself, this recipe is a guaranteed crowd-pleaser. Best of all, it requires minimal effort—so even beginner bakers can create this show-stopping treat. Let’s dive into the recipe!
Table of Contents
Understanding the Strawberry Earthquake Cake
What Makes It Unique
Strawberry Earthquake Cake is not your average dessert. What sets it apart is the delightful chaos of flavors and textures. Imagine a strawberry cake mix swirled with rich cream cheese and topped with white chocolate chips. As it bakes, the ingredients shift and crack, creating a unique “earthquake” effect. This cake is a fun visual treat and a delicious explosion of flavors.
The Origin of Its Name
The name “Earthquake Cake” comes from its appearance. As the cake bakes, the cream cheese and white chocolate create cracks and crevices, making it look like it has survived a minor tremor. This quirky feature is what gives the cake its name and makes it a conversation starter at any gathering.
Why You’ll Love This Recipe
There are plenty of reasons to fall in love with Strawberry Earthquake Cake:
- Simplicity: Even if you’re not a seasoned baker, this cake is easy to make with a boxed cake mix.
- Flavor: The combination of strawberries, cream cheese, and white chocolate is a match made in dessert heaven.
- Visual Appeal: The cracked surface gives it a rustic, homemade look that’s sure to impress.
- Versatility: You can customize it with different fruits or chocolate types to suit your taste.
Gathering Your Ingredients

Essential Ingredients for Success
Before you start baking your Strawberry Earthquake Cake, you need to gather the right ingredients. Having everything ready ensures a smooth baking process. Here’s what you’ll need:
- Strawberries: Fresh is best, but you can use frozen if that’s what you have. Just make sure to thaw and drain them well.
- Cake Mix: A box of white or vanilla cake mix works perfectly. It keeps things simple and quick.
- Cream Cheese: This is for that delicious swirl. Make sure it’s at room temperature so it mixes well.
- Butter: Adds richness to the cream cheese mixture.
- Confectioners’ Sugar: Sweetens the cream cheese swirl.
- Eggs, Water, and Oil: Standard for the cake mix.
- White Chocolate Chips: Optional, but they add a lovely texture and flavor.
Substitutions and Variations
Don’t worry if you’re missing something; there are plenty of substitutions:
- Cake Mix: Swap with any similar flavor like yellow or even strawberry for a twist.
- Butter: Margarine can work in a pinch, though the flavor will differ slightly.
- White Chocolate Chips: Try dark chocolate or even nuts if you prefer.
Where to Find the Best Ingredients
For the freshest strawberries, visit your local farmer’s market. They often have the best produce, especially during strawberry season. For cake mix and other essentials, any grocery store will have what you need. Keep an eye out for sales or bulk deals to save a bit of money. Specialty stores might carry high-quality chocolate chips if you’re looking to splurge a little.
Preparing Your Baking Tools
When it comes to baking a Strawberry Earthquake Cake, having the right tools can make all the difference. Being prepared will help you create a delicious cake without any hiccups. Here’s what you need to know to set up your baking station:
Must-Have Tools for Baking
- Mixing Bowls: At least two—one for the cake batter and another for the cream cheese mixture.
- Electric Mixer: This will save you time and effort when combining ingredients.
- Measuring Cups and Spoons: Accurate measurements are key to a successful cake.
- Spatula: A good spatula helps in mixing and scraping down the sides of bowls.
- Baking Dish: A 9×13-inch pan is ideal for this recipe.
- Cooling Rack: Essential for letting your cake cool evenly after baking.
Optional Tools for a Perfect Cake
- Whisk: Great for mixing dry ingredients or if you prefer to mix by hand.
- Parchment Paper: Lining your baking dish can make for easier cleanup.
- Sifter: If you want to ensure your dry ingredients are lump-free, a sifter can be handy.
Setting Up Your Baking Station
- Choose a Clean Surface: Make sure your counter or table is tidy and has enough space for all your ingredients and tools.
- Gather All Ingredients: Before you start, lay out everything you need so you don’t have to search for items mid-recipe.
- Preheat Your Oven: Don’t forget to preheat your oven to 350°F before you start mixing!
By preparing your tools and workspace in advance, you’ll be ready to whip up your Strawberry Earthquake Cake without a hitch!
Step-by-Step Guide
Mixing the Cake Batter
To kick things off, preheat your oven to 350°F (175°C) and grease a 9×13-inch baking dish. This size is perfect for achieving the right thickness. Start with a box of strawberry cake mix—it’s an easy shortcut that saves time. Follow the package instructions, usually involving eggs, water, and oil, and mix everything in a large bowl until smooth. Pour the batter into your prepared dish and set it aside for the moment.
Creating the Cream Cheese Swirl
Next, let’s add that delicious cream cheese swirl. In a separate bowl, combine 8 ounces of softened cream cheese, half a cup of melted butter, and 2 1/2 cups of powdered sugar. Beat these ingredients together until they’re smooth and creamy. Now, drop spoonfuls of this mixture over the cake batter. For an extra touch, sprinkle a cup of chopped strawberries and some white chocolate chips on top. Use a butter knife to gently swirl the cream cheese into the batter, creating lovely ribbons of flavor without over-mixing.
Baking to Perfection
Once your masterpiece is ready, pop it into the oven. Bake for about 40-45 minutes. You’ll know it’s done when a toothpick inserted into the center comes out clean. Let the cake cool completely before serving. The top might crack and shift, but that’s what gives it the ‘earthquake’ look! Once cooled, you can top it with whipped cream and extra strawberry slices for garnish if you like. Enjoy your delicious creation!
Tips for Perfecting Your Strawberry Earthquake Cake
Avoiding Common Mistakes
When making a Strawberry Earthquake Cake, a few small missteps can lead to big disappointments. First off, don’t overmix the batter. You want those beautiful swirls of cream cheese and strawberry to stand out. Mixing too much can make everything blend together, which isn’t what you want. Also, make sure your cream cheese is softened before mixing it with the butter and sugar. If it’s too cold, you’ll end up with lumps. Lastly, keep an eye on your oven temperature. Baking at too high a temperature can cause the cake to crack too much and dry out.
Enhancing the Flavor
To really make your cake pop, consider adding a few extra touches. A teaspoon of almond extract can complement the strawberry flavor beautifully. You might also try sprinkling some lemon zest into the batter for a fresh twist. For those who love a bit of texture, tossing in some chopped nuts, like pecans or almonds, can add a delightful crunch.
Presentation Tips
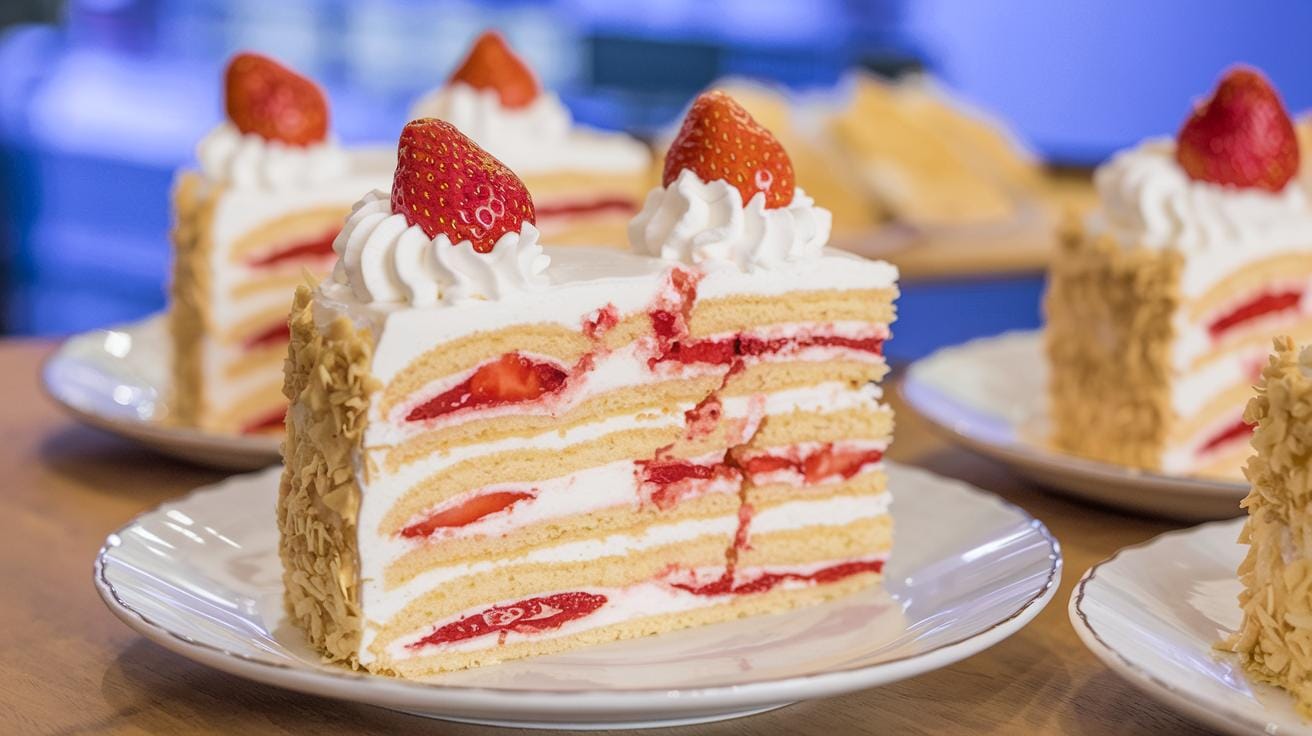
Presentation can make your cake even more inviting. Once your cake has cooled, sprinkle a dusting of powdered sugar on top for a classic look. Adding a few fresh strawberries on top can also make it look more appealing. If you’re serving it at a party, consider cutting the cake into small squares and placing them on a tiered cake stand. This not only makes it easier for guests to serve themselves but also adds a touch of elegance to your dessert table.
Serving Suggestions
Pairing with Beverages
Strawberry Earthquake Cake is a delightful dessert that pairs beautifully with a variety of drinks. For a refreshing option, serve it alongside a chilled glass of lemonade or iced tea. The citrusy tang of these beverages complements the cake’s sweet strawberry and creamy flavors perfectly. If you’re hosting an evening gathering, consider pairing the cake with a light, fruity rosé or a sparkling white wine. These wines enhance the cake’s flavors without overpowering them. And for those who prefer non-alcoholic options, a cold glass of milk or a hot cup of coffee can also be a comforting choice.
Garnishing Ideas
Elevate the presentation of your Strawberry Earthquake Cake with some simple garnishing ideas. A dollop of freshly whipped cream on each slice can add a touch of elegance and extra creaminess. For a pop of color and flavor, sprinkle some fresh strawberry slices or a handful of blueberries over the top. White chocolate shavings or curls can add a hint of sophistication and tie in the cake’s rich, creamy elements. If you’re feeling adventurous, try adding a drizzle of strawberry or chocolate sauce for an extra layer of indulgence.
Serving Size Recommendations
When it comes to serving Strawberry Earthquake Cake, portion size can depend on the occasion. For a casual family dessert, cutting the cake into larger squares or rectangles is perfectly fine. However, if you’re serving it at a party or gathering, consider slicing it into smaller, bite-sized pieces to allow guests to sample a variety of desserts. Typically, a 9×13-inch cake can comfortably serve 12 to 16 people, but you can adjust the size of the slices to fit your needs. Remember, this cake is rich and flavorful, so even a small piece can be quite satisfying.
If you love indulgent and unique cake recipes, be sure to check out our Swiss Chocolate Chalet Cake Recipe. It’s a rich, chocolatey delight that pairs perfectly with this Easy Strawberry Earthquake Cake!
Storing and Freezing Your Cake
How to Store for Freshness
To keep your Strawberry Earthquake Cake fresh, let it cool completely after baking. Once it’s cooled, cover it tightly with plastic wrap or aluminum foil, or place it in an airtight container. You can store it in the refrigerator for up to three days. Make sure to keep it sealed to prevent it from drying out.
Freezing for Later Enjoyment
If you want to keep the cake for more than three days, freezing is a great option. Here’s how to do it:
- Slice the cake into portions or leave it whole, depending on your preference.
- Wrap each piece tightly in plastic wrap, then place it in a freezer-safe container or a resealable freezer bag.
- Label the container with the date and type of cake.
You can freeze the cake for up to three months. When you’re ready to enjoy it, just let it thaw in the fridge overnight before serving.
Reheating Tips
If you prefer your cake warm, here are a few tips:
- Preheat your oven to 350°F (175°C).
- Place the cake or slices in an oven-safe dish and cover with aluminum foil to prevent it from drying out.
- Heat for about 10-15 minutes, or until warmed through.
Enjoy your delicious Strawberry Earthquake Cake anytime by following these simple storage and reheating methods!
Exploring Variations of the Earthquake Cake
Chocolate Earthquake Cake
Craving chocolate? You can easily transform the classic earthquake cake into a chocolate lover’s dream. Start with a chocolate cake mix and add in some cocoa powder for extra richness. Chocolate chips or chunks can be swirled into the batter, creating delightful pockets of melted chocolate throughout the cake. For an extra indulgent twist, consider adding a layer of chocolate ganache on top after baking.
Lemon Earthquake Cake
For those who love a zesty twist, the lemon earthquake cake is a refreshing alternative. Use a lemon cake mix and incorporate fresh lemon zest into the batter for a burst of citrus flavor. A drizzle of lemon glaze over the cooled cake can enhance its tanginess. This variation is perfect for spring gatherings or any time you want a light and bright dessert.
Customizing with Different Fruits
The beauty of the earthquake cake lies in its versatility. You can swap strawberries for other fruits like blueberries, raspberries, or even peaches. If you’re using berries, toss them in a bit of flour before adding them to the batter to prevent them from sinking. Experimenting with different fruit combinations can lead to exciting new flavors and textures. Consider mixing two or more fruits for a unique twist on this classic dessert.

Nutritional Information and Dietary Considerations
Caloric Content and Serving Size
When you indulge in a slice of Strawberry Earthquake Cake, you’re looking at about 500 calories per serving. This cake is rich and delicious, so it’s best enjoyed in moderation. Each serving also contains approximately 73g of carbohydrates, 4g of protein, and 22g of fat. If you’re watching your calorie intake, consider sharing a slice with a friend or saving half for later.
Allergen Information
This cake contains several common allergens including dairy, gluten, and eggs. If you’re allergic or sensitive to any of these ingredients, you might want to explore some substitutions. For example, using a gluten-free cake mix or dairy-free cream cheese can help make this dessert more accessible.
Making It Healthier
Want to enjoy this cake without feeling too guilty? Here are a few tips:
- Use a sugar substitute: Try using a natural sweetener like stevia or monk fruit.
- Opt for low-fat cream cheese: This can help cut down on some of the fat content.
- Add more fruit: Boost the nutritional value by adding extra strawberries or other fruits like blueberries or raspberries.
Making small changes can help you enjoy this delicious cake while keeping an eye on your dietary needs.
Final thoughts
So there you have it, the Strawberry Earthquake Cake—a dessert that’s as fun to make as it is to eat. With its mix of creamy, fruity, and chocolaty goodness, this cake is sure to be a hit at any gathering. Whether you’re a seasoned baker or just starting out, this recipe is simple enough to follow and yields impressive results. Plus, it’s a great way to use up those fresh strawberries. Give it a try and watch it disappear from the table in no time. Happy baking!
Frequently Asked Questions
Can I use frozen strawberries in the cake?
Yes, you can use frozen strawberries, but make sure to thaw and drain them well before adding to the batter.
What if I don’t have white chocolate?
You can substitute with milk or dark chocolate, though the flavor will be slightly different.
How can I make the cake gluten-free?
Use a gluten-free cake mix and ensure all other ingredients are gluten-free as well.
Can I make this cake without cream cheese?
You can try using a dairy-free cream cheese substitute or omit it, though it will change the texture.