Understanding Gluten-Free Baking
Gluten-free baking can seem a bit daunting at first, but once you get the hang of it, it’s really rewarding. Gluten is the protein found in wheat, barley, and rye that gives dough its elasticity. When baking without it, you’ll need to use alternative flours like almond, coconut, or rice flour. These flours have different properties, so you might need to experiment a bit to get the texture just right. Xanthan gum or guar gum is often added to help mimic the binding properties of gluten.
Table of Contents
Why Choose Gluten-Free for Cakes
Opting for gluten-free cakes isn’t just for those with celiac disease or gluten intolerance. Many people find that gluten-free cakes are lighter and easier to digest. Plus, with the right recipe, they can taste just as delicious as their gluten-filled counterparts. Whether you’re catering to dietary restrictions or just exploring new baking avenues, gluten-free cakes can be a delightful choice.
Common Mistakes in Gluten-Free Baking
It’s easy to make mistakes when you’re new to gluten-free baking. Here are some common pitfalls to avoid:
- Not measuring accurately: Gluten-free flours can vary widely, so precise measurements are crucial.
- Skipping the gum: Don’t forget to add a binding agent like xanthan gum unless your flour blend already includes it.
- Overmixing the batter: This can lead to a dense cake, as gluten-free batters don’t have the same elasticity as regular ones.
- Ignoring the recipe’s specific instructions: Gluten-free recipes are often carefully designed to balance ingredients for the best texture and flavor. Stick to them closely, especially when you’re starting out.
Choosing the Right White Chocolate

Types of White Chocolate
When it comes to baking your gluten-free white chocolate cake, not all white chocolates are created equal. You have a few options to choose from:
- White Chocolate Bars: These are great for melting and using in your cake batter. They usually contain more cocoa butter, which gives a richer flavor.
- White Chocolate Chips: Convenient for mixing directly into the batter, though they might not melt as smoothly as bars.
- White Chocolate Discs or Buttons: These melt easily and are often used by professionals for their consistency.
How to Select Quality White Chocolate
Selecting the right white chocolate is crucial for your cake’s taste and texture. Here’s what to look for:
- Cocoa Butter Content: Aim for white chocolate with a high cocoa butter content. This ensures a smoother, creamier texture.
- Avoid Compound Chocolate: These use vegetable fats instead of cocoa butter, which can affect the taste and quality.
- Check for Gluten-Free Labels: Ensure that the chocolate is certified gluten-free to avoid any contamination.
White Chocolate Brands to Consider
Here are some brands that are known for their quality white chocolate:
- Ghirardelli: Known for its smooth texture and rich flavor, Ghirardelli offers a reliable option for baking.
- Callebaut: A favorite among chefs for its creamy consistency and high cocoa butter content.
- Valrhona: Offers a luxurious taste, perfect for those looking to splurge on their baking ingredients.
Choosing the right white chocolate can make a significant difference in the outcome of your gluten-free cake, so take the time to select wisely. Whether you prefer bars, chips, or buttons, ensuring high quality will enhance your baking experience and the final product.
Essential Ingredients for a Gluten-Free White Chocolate Cake
Gluten-Free Flour Options
When baking a gluten-free white chocolate cake, choosing the right flour is the first step to success. Gluten-free flour blends are a lifesaver, as they mimic the texture of regular flour without the gluten. Brands like Bob’s Red Mill offer 1:1 baking flour that works wonders. You can also mix your own using rice flour, potato starch, and tapioca flour for a custom blend. Remember, adding a bit of cornstarch can help achieve that fluffy texture you’re aiming for.
Substitutes for Common Allergens
If you’re dealing with multiple dietary restrictions, there are several substitutions you can make. For dairy, try using coconut oil or a vegan butter substitute. Just be cautious with white chocolate as it often contains dairy; opt for a dairy-free version if needed. Eggs are a bit trickier to replace in this recipe due to their role in binding and leavening, but applesauce or a commercial egg replacer might work in a pinch.
Importance of Fresh Ingredients
The freshness of your ingredients can make or break your cake. Always use fresh eggs, and if you’re making your own buttermilk substitute, ensure it’s mixed just before use. Fresh white chocolate is crucial, as it should melt smoothly and blend well with the other ingredients. Stale or low-quality white chocolate can lead to a gritty texture and uneven flavor. Keeping your ingredients fresh ensures that your cake will not only taste great but also have the perfect texture.
Step-by-Step Guide to Making the Cake
Preparing Your Baking Tools
Before you begin, make sure you have all the right tools ready. This includes your cake pans, mixing bowls, and measuring cups. It’s always a good idea to line your cake pans with parchment paper. This helps prevent the cake from sticking and makes it easier to remove once baked. Gather your electric mixer if you have one, or a sturdy whisk if not.
Mixing the Batter
Start by preheating your oven to 350°F (175°C). In a large bowl, combine your dry ingredients: gluten-free flour, baking powder, and a pinch of salt. In a separate bowl, cream together softened butter and sugar until fluffy. Add eggs one at a time, beating well after each addition. Melt your white chocolate and let it cool slightly before stirring it into the mixture along with vanilla extract. Gradually add the dry ingredients to the wet mixture, alternating with milk, until everything is just combined.
Baking and Cooling the Cake
Once your batter is ready, pour it evenly into your prepared cake pans. Smooth the tops with a spatula. Place the pans in the preheated oven and bake for about 25-30 minutes. You’ll know the cakes are done when a toothpick inserted into the center comes out clean. Let the cakes cool in the pans for about 10 minutes before transferring them to a wire rack to cool completely. This cooling step is crucial to ensure your cake sets properly and doesn’t crumble when frosting.
Creating the Perfect White Chocolate Frosting

Ingredients for White Chocolate Frosting
Crafting the perfect white chocolate frosting starts with gathering the right ingredients. Here’s what you’ll need:
- White Chocolate: Opt for high-quality white chocolate. It makes all the difference in flavor and texture. Brands like Ghirardelli or Nestle are excellent choices.
- Butter: Use unsalted butter, softened at room temperature. This helps in achieving a creamy consistency.
- Powdered Sugar: Ensure your powdered sugar is gluten-free. Some brands add wheat starch as an anti-caking agent, so check the label.
- Vanilla Extract: A splash of pure vanilla extract enhances the flavor of the frosting.
- Heavy Cream: This helps in making the frosting smooth and spreadable.
Tips for a Smooth Frosting
Achieving a smooth frosting involves a few key steps:
- Melt the Chocolate Carefully: Use a double boiler to melt the white chocolate slowly. This prevents burning and ensures a silky texture.
- Beat the Butter Well: Whip the butter until it’s light and fluffy before adding other ingredients. This is crucial for a light frosting.
- Sift the Powdered Sugar: Sifting removes any lumps, resulting in a smoother finish.
- Adjust Consistency: If your frosting is too thick, add a bit more cream. If too thin, a little extra powdered sugar will do the trick.
How to Frost Your Cake
Once your frosting is ready, it’s time to decorate your cake:
- Start with a Crumb Coat: Apply a thin layer of frosting to seal in the crumbs. Chill the cake for about 15 minutes.
- Apply the Final Layer: Spread a generous amount of frosting over the cake, smoothing it out with a spatula.
- Decorate as Desired: Use a piping bag for intricate designs or keep it simple with a smooth finish. Remember, the frosting is not just about taste, but also about making your cake look irresistible.
Creating the perfect white chocolate frosting is all about balancing flavors and textures. With these tips and tricks, your cake will not only taste great but look stunning too!
Decorating Ideas for Your Cake
Simple Decoration Techniques
Decorating a cake doesn’t need to be rocket science. You can achieve a beautiful look with just a few basic techniques. Start by smoothing out the frosting. Use a spatula or a cake scraper to even out the surface. If you want a rustic look, leave some texture on the frosting. For a classic touch, try piping simple borders or rosettes around the edges using a piping bag and nozzle. Even if you’re not a pro, these small touches can make a big difference.
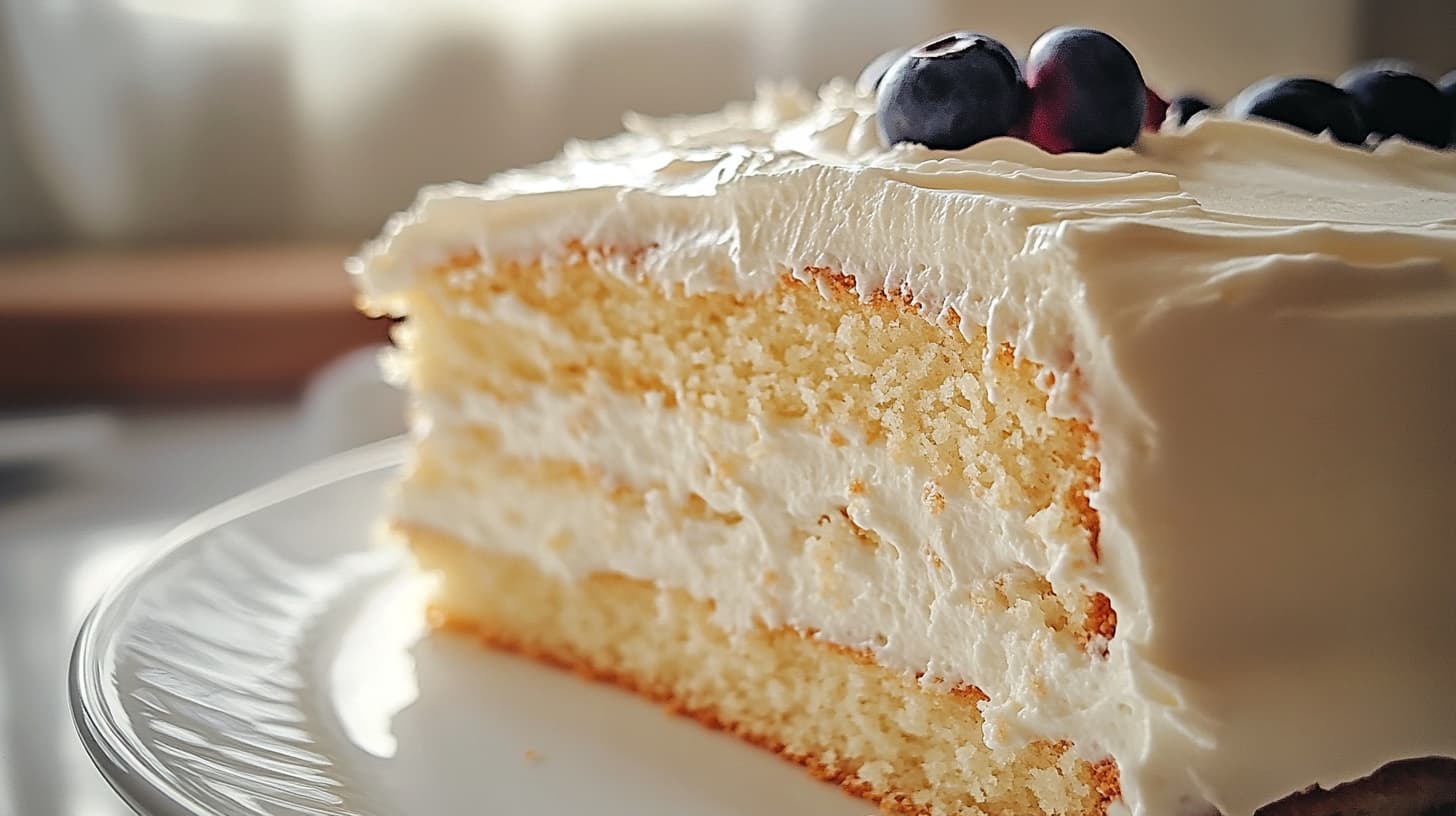
Using Fruits and Nuts
Incorporating fruits and nuts into your cake decoration adds both color and texture. Fresh berries like strawberries, raspberries, or blueberries can be placed on top for a pop of color. Sliced almonds or chopped walnuts sprinkled over the frosting can give your cake a gourmet finish. Not only do these additions look great, but they also add a burst of flavor that complements the white chocolate.
Creative Frosting Designs
If you’re feeling adventurous, why not try some creative frosting designs? You can use a fork or the back of a spoon to create patterns on the frosting. For a more artistic touch, try marbling two different colors of frosting together. This technique is simple but looks incredibly impressive. Don’t be afraid to experiment with different tools and techniques to find a style that you love.
Tips for Storing and Serving
How to Store Your Cake
Keeping your gluten-free white chocolate cake fresh is key to enjoying it over several days. Once your cake has cooled completely, you can leave it at room temperature for up to a day. Ensure it’s covered with a cake dome or wrapped in plastic wrap to prevent it from drying out. If you need to store it longer, place it in the refrigerator. When refrigerated, your cake should stay fresh for about 5 to 7 days. For even longer storage, consider freezing it. Wrap the cake tightly in plastic wrap and then in aluminum foil, or use an airtight container. This method can keep your cake good for up to three months. When you’re ready to enjoy it, let it thaw in the fridge overnight.
Best Ways to Serve
Serving your cake is as important as baking it. To get the best flavors from your gluten-free white chocolate cake, serve it at room temperature. This allows the flavors to be more pronounced. Slice the cake with a sharp knife, wiping the blade clean between cuts to maintain neat slices. Consider serving it with a dollop of whipped cream or a scoop of vanilla ice cream to complement the white chocolate flavor. If you’re feeling adventurous, a drizzle of raspberry or strawberry sauce can add a delightful tangy contrast.
Pairing with Beverages
Pairing your cake with the right beverage can elevate the experience. A hot cup of coffee or a creamy latte pairs wonderfully with the sweetness of white chocolate. If you prefer tea, opt for a light green tea or an herbal infusion like chamomile to balance the cake’s richness. For those who enjoy a bit of bubbly, a glass of sparkling wine or champagne can add a celebratory touch to your dessert. Enjoying your cake with the right drink can make all the difference in your tasting experience.
Troubleshooting Common Issues
Cake Not Rising
So, your cake decided to stay flat? Don’t worry, it happens to the best of us. Here’s what might be going wrong:
- Expired Baking Powder or Baking Soda: These leavening agents lose their potency over time. Always check the expiration date before using them.
- Overmixing the Batter: Too much stirring can knock the air out, making your cake dense. Mix just until combined.
- Incorrect Oven Temperature: If your oven is too cool, the cake won’t rise properly. Use an oven thermometer to ensure the correct temperature.
Frosting Too Runny
Runny frosting can be a nightmare, especially if you’re aiming for those perfect swirls. Here’s how to fix it:
- Chill the Frosting: Pop it in the fridge for about 15-20 minutes. The cool air will help it firm up.
- Add More Sugar: Gradually add a bit more powdered sugar to thicken it up. Be careful not to overdo it, or it’ll become too sweet.
- Use Less Liquid: Next time, try using less milk or cream. Start with a small amount and add more if needed.
Cake Crumbling
A crumbly cake can make serving a slice quite the challenge. Here’s how to avoid it:
- Too Little Moisture: Make sure you’re measuring your wet ingredients correctly. Too little moisture can lead to a dry, crumbly cake.
- Overbaking: Keep an eye on your cake while it’s in the oven. Overbaking can dry it out, causing it to crumble.
- Wrong Flour Mix: Using the wrong blend of gluten-free flour can affect the cake’s texture. Stick to a trusted brand or mix for best results.
Exploring Variations of the Recipe
Adding Flavors and Fillings
If you’re looking to spice up your gluten-free white chocolate cake, adding extra flavors and fillings can make all the difference. Consider incorporating a hint of citrus zest, like lemon or orange, to the batter for a refreshing twist. You can also fold in some fresh or dried fruits such as raspberries or blueberries, which pair wonderfully with white chocolate. For a creamy surprise, try layering the cake with a rich filling like a raspberry coulis or a tangy lemon curd. Experimenting with flavors can turn a simple cake into a gourmet dessert.
Making Cupcakes Instead
Turning your cake recipe into cupcakes is a great way to make serving easier and more fun. Simply divide the batter into cupcake liners, filling each about two-thirds full. Bake them at the same temperature as the cake, but reduce the time to about 18-22 minutes. This variation not only offers a grab-and-go option but also allows for individual decorating. Top each cupcake with a swirl of white chocolate frosting and maybe a sprinkle of edible glitter for a festive touch.
Adjusting for Dietary Needs
Adapting your cake recipe to cater to various dietary needs can be simple. For a dairy-free version, substitute the butter with a plant-based alternative and use coconut milk instead of regular milk. If you’re avoiding refined sugar, try using maple syrup or honey as a natural sweetener. You can also make the cake nut-free by choosing a safe gluten-free flour blend and ensuring all other ingredients are free from cross-contamination. With a few tweaks, you can make sure everyone at the table can enjoy a slice.
Nutritional Information and Benefits
Calorie Count and Serving Size
When you’re indulging in a slice of gluten-free white chocolate cake, you might be curious about its nutritional profile. Generally, a serving size is approximately one slice, assuming you’ve cut the cake into 12 pieces. Here’s a rough breakdown of what you might expect:
| Nutrient | Amount per Slice |
|---|---|
| Calories | 350-400 |
| Total Fat | 18g |
| Saturated Fat | 10g |
| Carbohydrates | 45g |
| Sugar | 30g |
| Protein | 5g |
Keep in mind, these values can vary based on the specific ingredients you use, like the type of gluten-free flour or the brand of white chocolate.
Health Benefits of Gluten-Free Baking
Switching to gluten-free baking isn’t just for those with celiac disease. Many people find that reducing gluten can lead to less bloating and improved digestion. Gluten-free baking can open doors to experimenting with diverse grains and flours, like almond or coconut flour, which can add unique flavors and nutrients to your cake. Plus, gluten-free options often incorporate more whole foods, leading to a diet that’s rich in fiber and antioxidants.
Understanding Sugar Content
White chocolate cakes are undeniably sweet, and it’s important to be aware of the sugar content. While the sugar in white chocolate adds to the cake’s flavor, it’s also something to moderate. Consider these tips to manage sugar intake:
- Use natural sweeteners like honey or maple syrup when possible.
- Opt for unsweetened or less sweet white chocolate if you’re watching your sugar levels.
- Balance your cake with a side of fresh fruits to add natural sweetness and fiber.
By being mindful of the ingredients, you can enjoy your cake while keeping an eye on nutritional balance.
Frequently Asked Questions
Can I Make This Dairy-Free?
Absolutely! You can swap out the dairy ingredients with non-dairy alternatives. For instance, replace regular milk with almond, coconut, or oat milk. Butter can be substituted with vegan butter or margarine. Make sure to choose a dairy-free white chocolate as well. Many brands offer vegan white chocolate chips that work perfectly for this recipe.
What if I Don’t Have White Chocolate?
No white chocolate? No problem! You can use dark or milk chocolate instead, but keep in mind that it will change the flavor profile of the cake. If you’re keen on keeping it white chocolate, consider using white chocolate flavoring or essence as a substitute. Alternatively, you might try adding vanilla extract for a different but still delicious twist.
How Long Does It Take to Bake?
The total baking time for this gluten-free white chocolate cake is approximately 30 to 35 minutes. However, this can vary depending on your oven. It’s always a good idea to check the cake around the 30-minute mark. Insert a toothpick in the center; if it comes out clean, your cake is ready. If not, give it a few more minutes and check again. Remember, baking times can vary, so keep an eye on it to avoid overbaking.
Wrapping It Up
So there you have it, a gluten-free white chocolate cake that’s not just a treat for those avoiding gluten, but a delight for everyone. It’s one of those recipes that seems fancy but is actually pretty straightforward. Whether you’re baking for a special occasion or just because you feel like having cake, this one’s a winner. The blend of white chocolate and vanilla gives it a rich, creamy flavor that’s hard to resist. Plus, knowing it’s gluten-free means everyone can enjoy a slice without worry. Give it a try, and you might just find it becomes a regular in your baking rotation. Happy baking!
Frequently Asked Questions
Can I make this cake without dairy?
Yes, you can try using dairy-free substitutes like almond milk and vegan butter. However, finding a good dairy-free white chocolate might be tricky.
What if I don’t have white chocolate?
If you don’t have white chocolate, you can try using milk or dark chocolate, but it will change the flavor of the cake.
How long does it take to bake this cake?
It usually takes about 30 to 35 minutes to bake, but keep an eye on it as ovens can vary.